Importing Slide Decks from the Cloud
Table of Contents
Are you tired of using the same old tricks to make your slides and presentations resonate? Want something more interactive and personal than clicking your way through your slide templates? That’s where Explain Everything comes in. Instead of star-wiping your way to presentation mediocrity, allow Explain Everything’s infinite canvas and simple to use tool set to give you the ability to quickly and easily create a truly unique story or provide dynamic feedback.
In this Tuesday Tips we show you how to get your existing decks into Explain Everything. Be sure to tune in next week for the second installment on how to really amplify your slides once they’re in the app.
Related: 3 Ways Businesses Can Engage Audiences
What you’ll need:
- An existing slide deck.
- A cloud source where the deck is saved.
- And of course, Explain Everything
Step 1
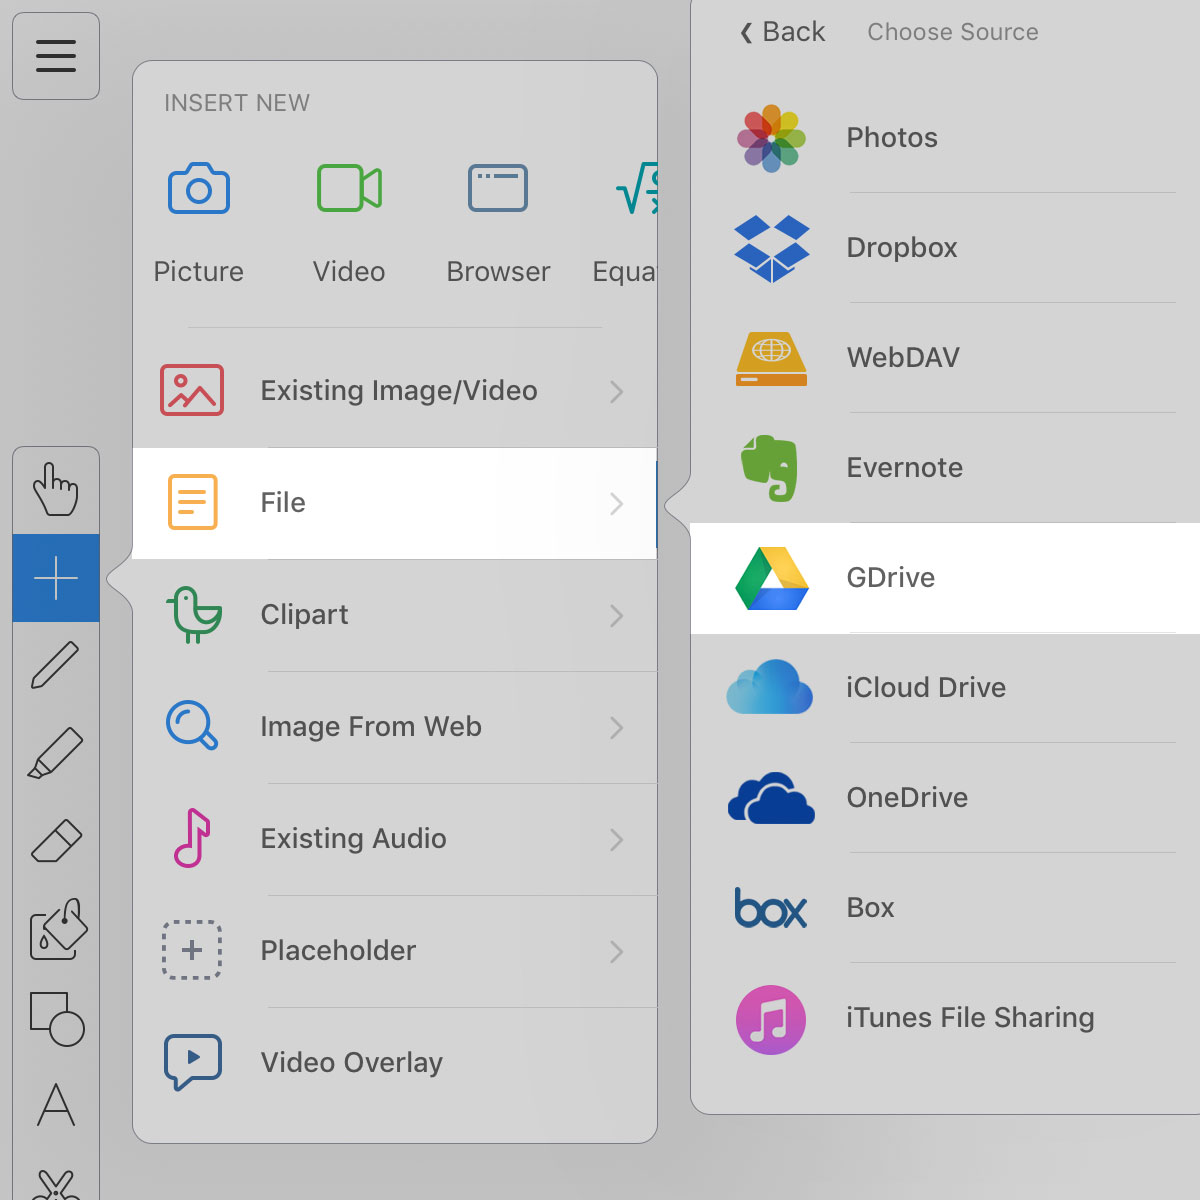
After you have your slides saved to your preferred cloud source, start a new Explain Everything project and go to the + Button in the toolbar. You’ll see a secondary menu with various media options. Select the File option then select your cloud source in the following menu. In our example we chose Google Drive.

Step 2
Next, you’ll see the file sorter with folders and files. Navigate to your file and tap to select it. You’ll see a check mark icon on your file when it is ready. Then tap Import in the upper right corner.

Pro Tips:
- Use the search bar to quickly find your file.
- You can import PowerPoint, Keynote and PDF slides!
- Start a project with slides right away using the From Pictures or Documents option.

Step 3
In this last step you’ll see a preview of all of the slides in your deck. All of your sides will be selected by default. If you just want specific ones, simply deselect them by tapping on them or you can Deselect All with the option in the bottom corner.
You can also choose to insert multiple slides into one canvas or distribute them to multiple canvases. If you choose to insert multiple slides to one canvas they will stack on top of each other by default. You can opt to have them vertically distributed with the option in the bottom right.

There you have it! All of your existing decks right at your fingertips in Explain Everything to truly make your own. It’s so easy, after awhile you won’t even know you’re doing it.
Like this tip? Check out part two of this post to further enhance your decks!
Happy Explaining!

