Start broadcasting your whiteboard with these tips
Table of Contents
Interactivity and immediacy are traits we associate with up close and personal, face-to-face situations. Countless teachers we have talked to say that’s what they miss most about lessons in the classroom.
Luckily, the 21st century has brought us lots of ways to communicate in real time even when we are miles away from each other. One of them is whiteboard broadcasting, and that’s the element of online teaching we’d like to introduce you to today.
Distance learning: advantages and what to look out for
Trying to catch up and keep up with online learning methods has been an unprecedented challenge for everyone working in education. It is worth the hard work, though. And while it is true that remote learning may never be as good as sharing a classroom with your students, it does have several undeniable advantages over the traditional classroom.
Ronnie Seneque, a middle school math teacher and guest of our recent 10-hour marathon webinar, pointed out several positives exclusive to online schools. These include being able to easily mute students that are being disruptive, or how beneficial explainer videos can be to underachieving kids who may need to rewatch material several times before absorbing it.
This is not to say there aren’t any pitfalls. Striving for perfection right from the start is sure to cause teachers and lecturers tons of unnecessary anxiety. And allowing online lessons to become monologues with zero student participation is the opposite of engaging…not to mention students could waste hours doing who knows what while you talk on, blissfully unaware.
So with all that said, where to start?
Whiteboard broadcasting for quality online lectures
Explain Everything Whiteboard offers a robust set of features for all sorts of remote scenarios, so don’t worry if it takes you a moment to familiarize yourself with its capabilities. It is, after all, the best digital whiteboard available. You’re also sure to learn to do little tricks of your own sooner or later! But if you’ve just installed it and are wondering where to start, let us offer some suggestions.
Getting started with Explain Everything Whiteboard
As our friend and partner Gavin pointed out during our webinar on Remote teaching, the best place to start anything is at the start, so don’t feel like you have to be a real-time broadcasting whiz from the get-go. Start off your adventure with Explain Everything Whiteboard by getting familiar with the key components. The easiest way to do this is just get on the app and do some discovering!
Make sure you learn to:
- Add media to your canvas — Explain Everything Whiteboard allows you to add anything from images to slides, audio files and even entire browsers!
- Move things around the infinite canvas.
- Annotate elements that need additional clarification.
- Remove stuff you don’t want.
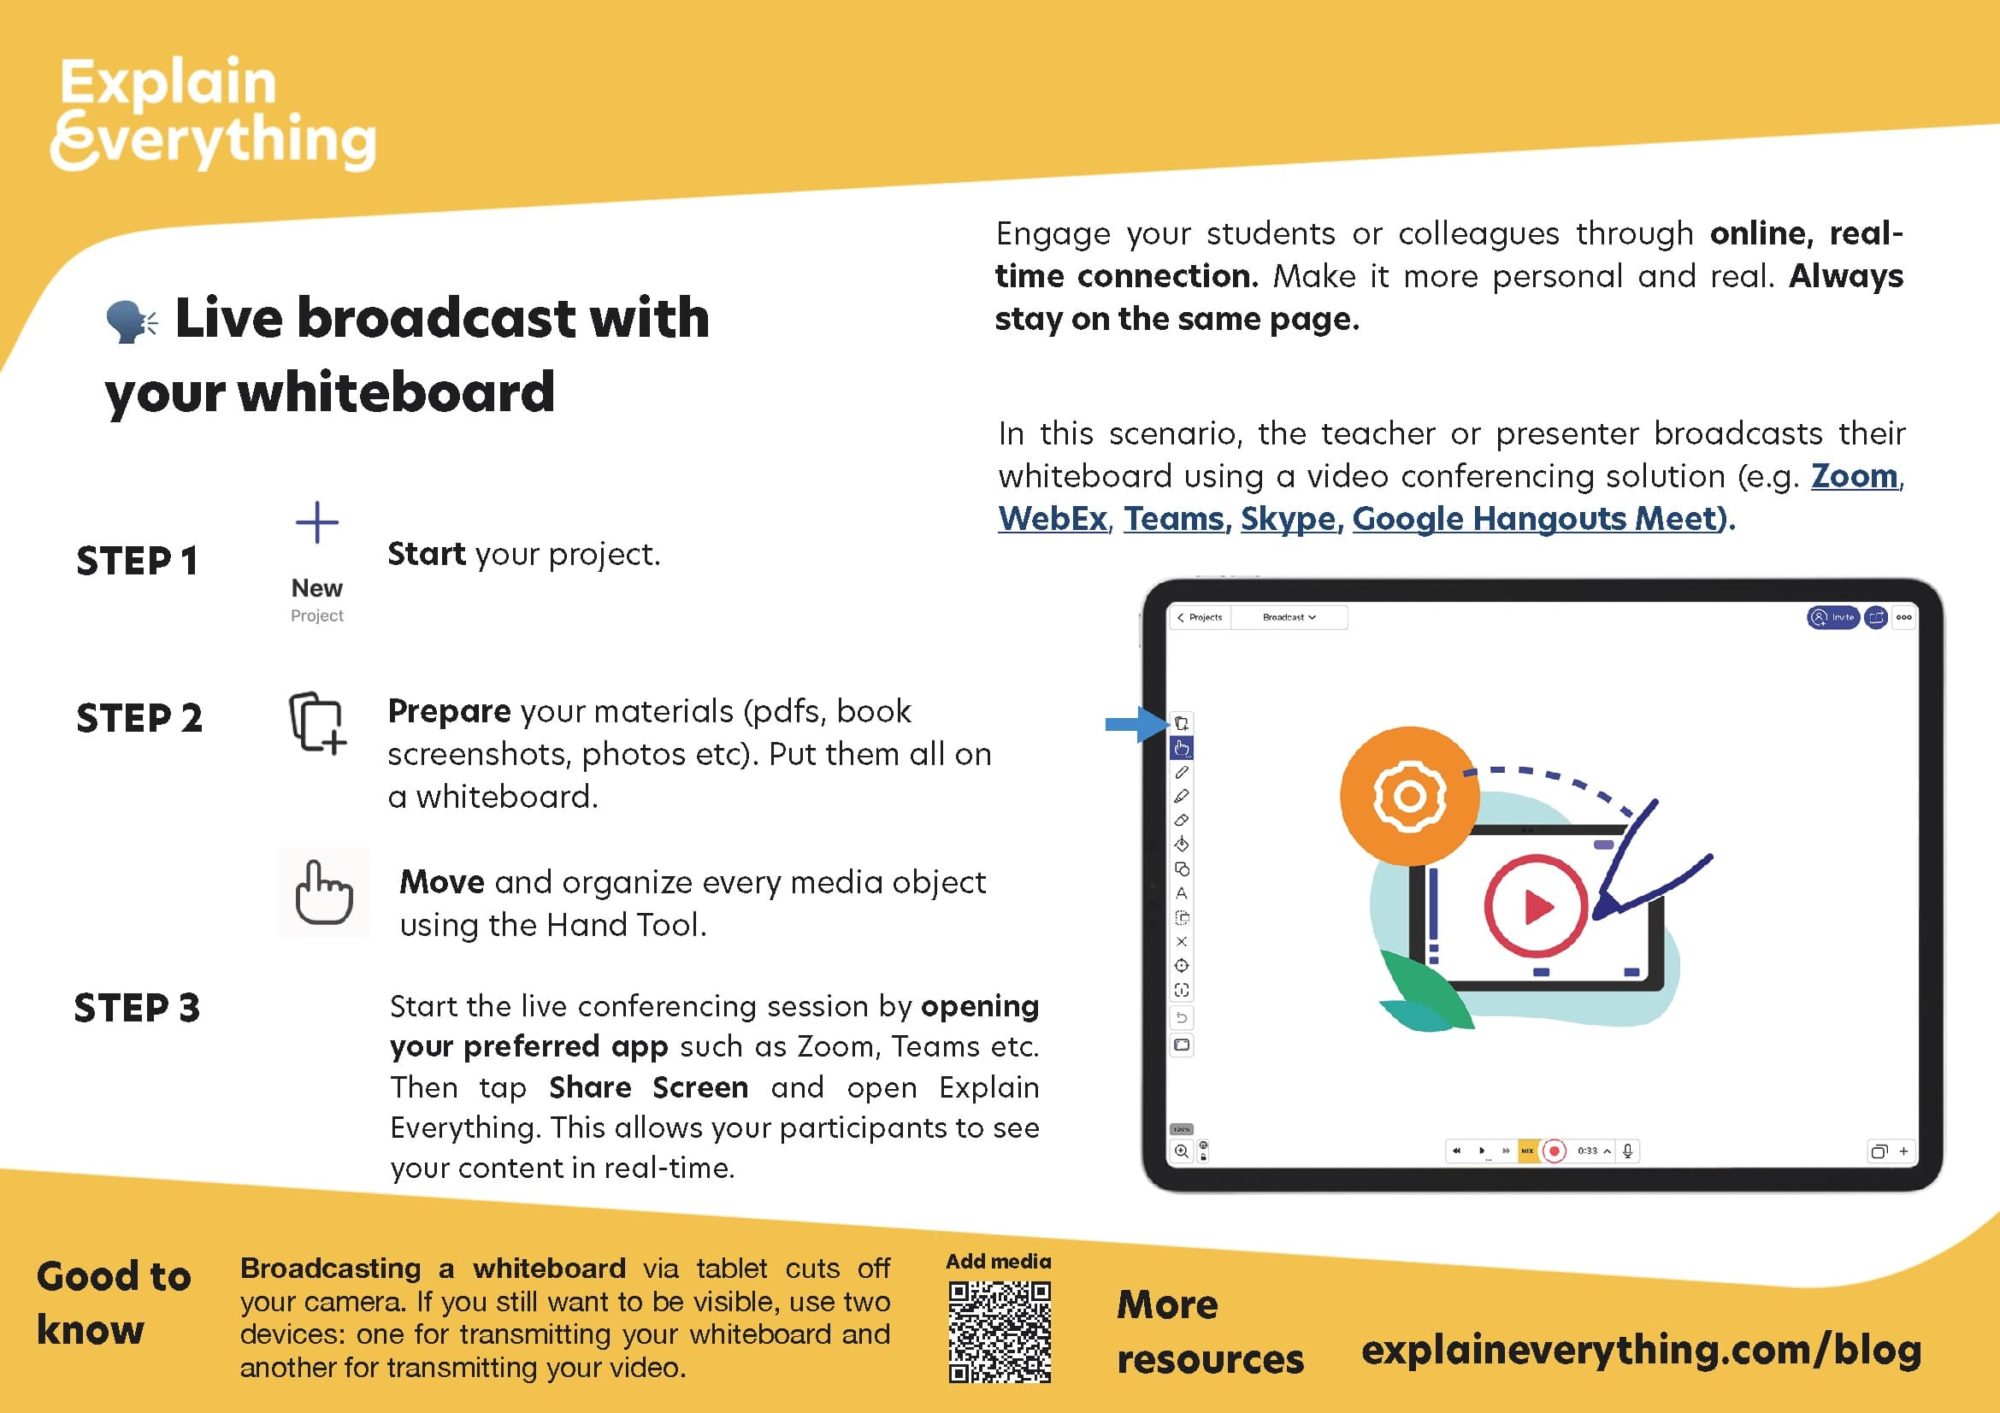
And don’t forget to prepare your project and do a 5-minute test run before you start your lecture or lesson! To do this, we suggest you follow these simple steps:
- Prep your materials and import them to your whiteboard.
- Do a test run to make sure everything works. Don’t worry too much about everything being flawless, though. In fact, it’s perfectly ok to be messy — messiness adds character and authenticity!
- PRO TIP: Record your test run in Explain Everything to have a backup video lesson in case you can’t connect with your students. Watch video
Connecting with your students
Broadcasting your whiteboard will let you be as close to your students as you can from far away. Use Explain Everything Whiteboard in tandem with Zoom, Microsoft Teams, Google Meetings, Cisco Webex Blue Jeans, or another communicator installed on your device, and interact with your students in real time.
Follow these simple steps to get set up for your lesson:
- Create your meeting link — most conferencing solutions have a way to set up a link that to your online room that will remain the same at all times.
- Send that meeting link off to your students — you can do this via email, LMS, or using virtually any other communicator.
- Enter your meeting room 5-10 minutes before your students to make sure you’re ready to go.
- Check your connection — look for a connection quality indicator in your conferencing solution. This is crucial. If you can’t set up a stable connection, consider an alternative, asynchronous method of delivering this lesson to your students.
- Share your Explain Everything screen.
- Once your lecture starts, be sure to confirm your students can hear and see your screen well. This can be done easily by using the chat in your conferencing solution.
Whiteboard broadcasting tips
- We’ll say it again: don’t sweat the small things. Your students need you to be present way more than they need you to be perfect.
- If your connection lags a little sometimes, don’t sweat that, either. This is the internet, this happens, everybody knows it, and that’s ok.
- Set participants as viewers so they don’t disrupt your instruction.
- Have a backup plan. If something goes wrong and you can’t connect with your students, a short overview video of the topic will ensure your students get to learn on their own.
Broadcasting your whiteboard helps create an engaging, fun lecture and bridge the distance between you and your students. Download Explain Everything Whiteboard and let’s do it together!
Learn more about broadcasting in distance teaching. Sign up for the webinar

