Documenting and improving students’ thinking using whiteboard recordings

Table of Contents
Demystify the learning process with the help of Explain Everything Whiteboard
Of the many ways to uncover what students are thinking and how they are thinking it, one of the most efficient practices is to record the steps they take while working on assignments and then provide one-to-one feedback within the same project.
The practice of documenting (that is recording, observing, interpreting, and sharing learning artifacts) has been proven to deepen learning1 2. It allows teachers to observe the actual learning process, make note of the strategies being used, and comment on the student’s developing understanding of a given subject. Such practice supports the student’s understanding and may also be an effective way to keep parents in the loop.
Explain Everything Interactive Whiteboard is equipped with a powerful recording functionality. Here’s a classroom-proven scenario you can replicate to your student’s success:
Advancing learner understanding by enhancing the student’s recording with their teacher’s suggestions.
In this scenario, the whiteboard is used during a student assignment. Recording the teacher allows that teacher to monitor progress and ask questions at appropriate points of the recording in order to advance the student’s understanding. This scenario works across multiple subject areas. Here’s how:
Prerequisites:
Equip students with Apple or Google tablets (any supported Apple iPads or Google Chrome devices). Both Explain Everything EDU or the subscription-based Explain Everything Interactive Whiteboard can be used.
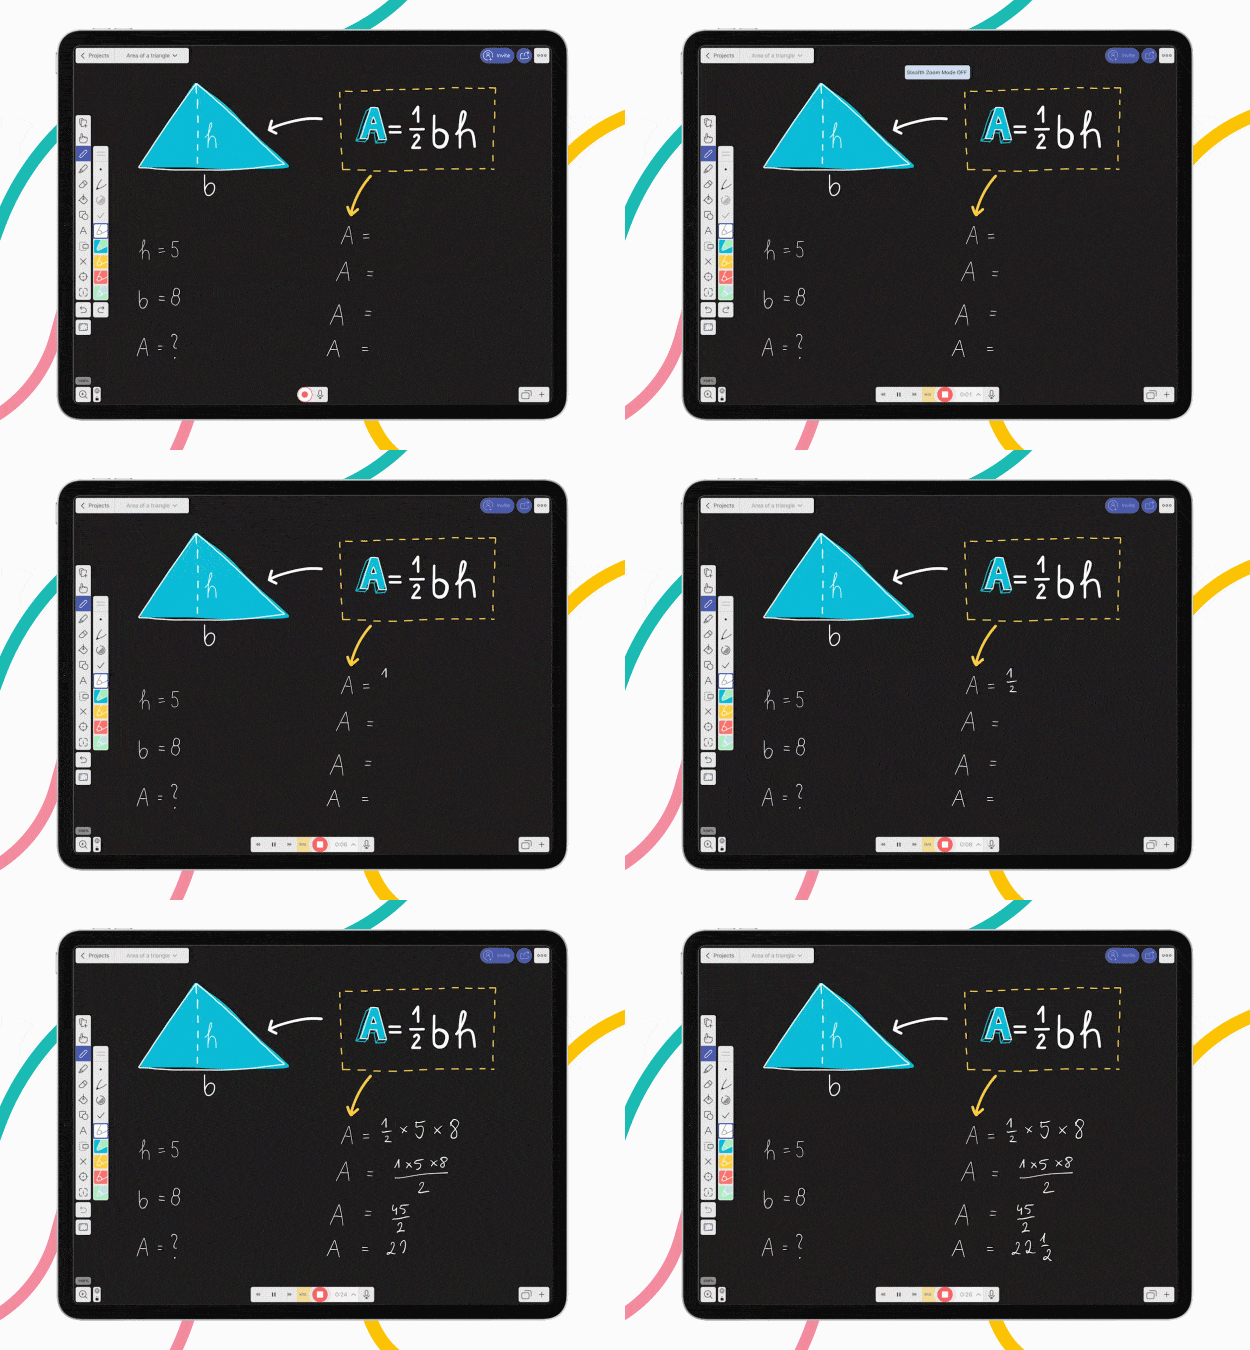
1. Ask your student to use recording while completing the assignment
(Press record to begin. To redo, rewind and use overwrite mode to record again)
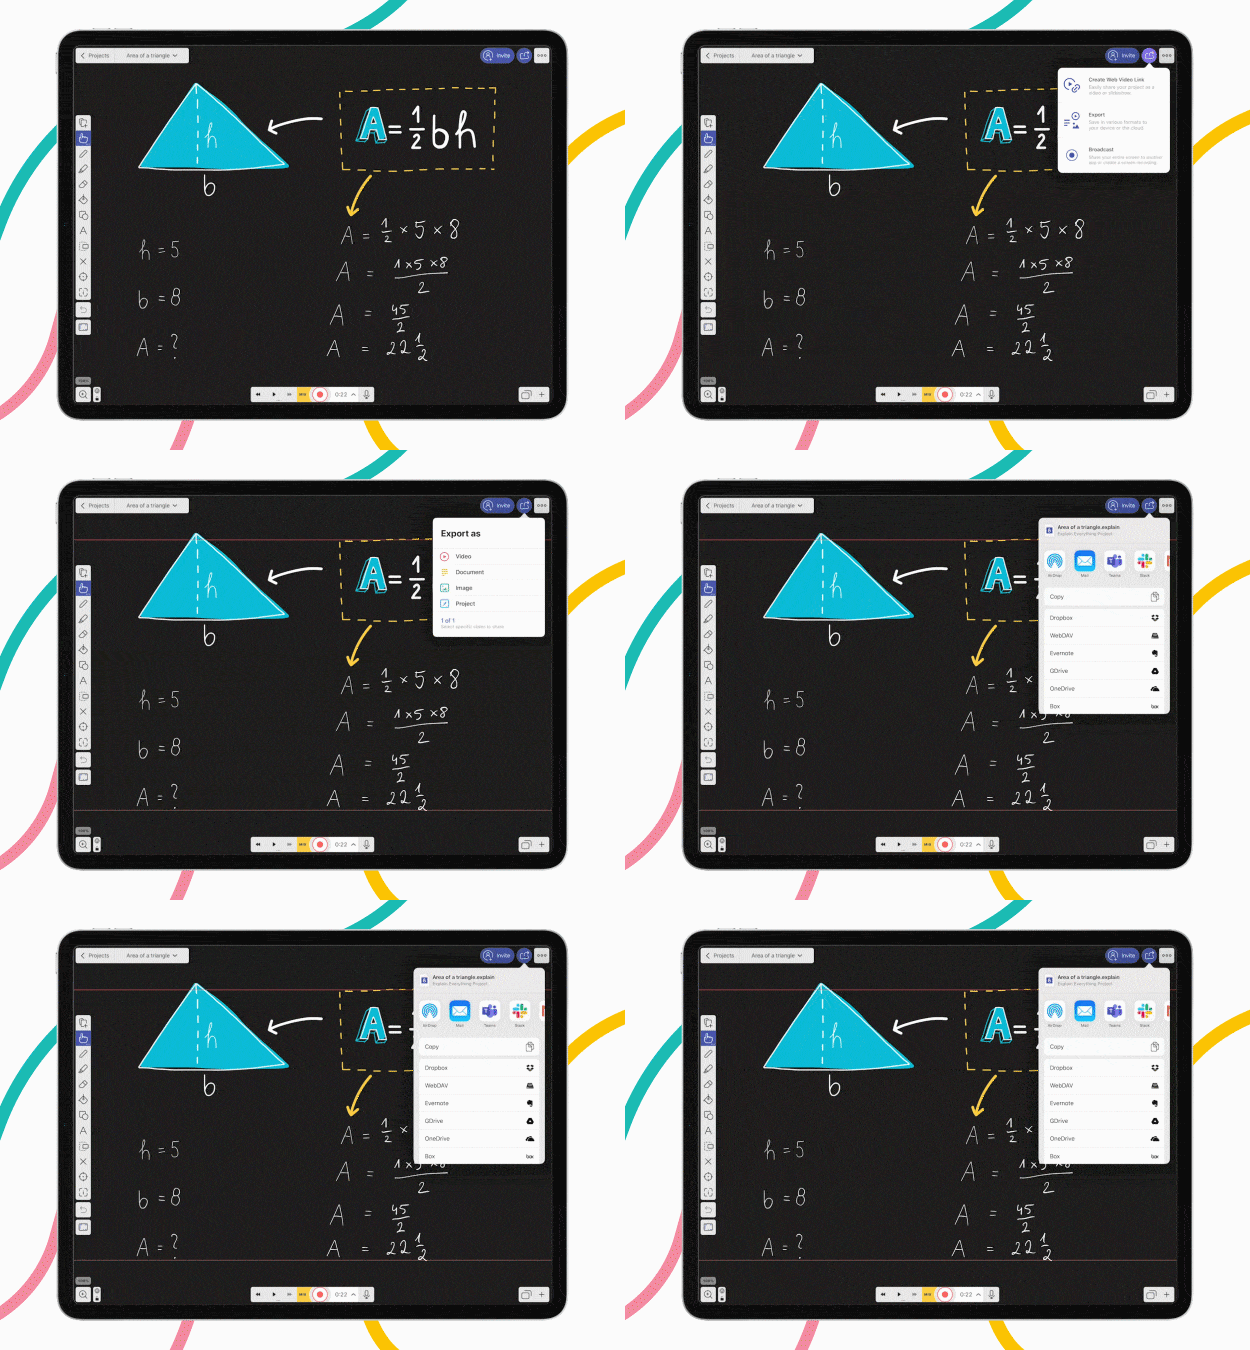
2. Collect projects from student devices.
Ask students to share their projects when ready by using (Export -> Project -> (transfer directly or using your school’s repository or learning platform).
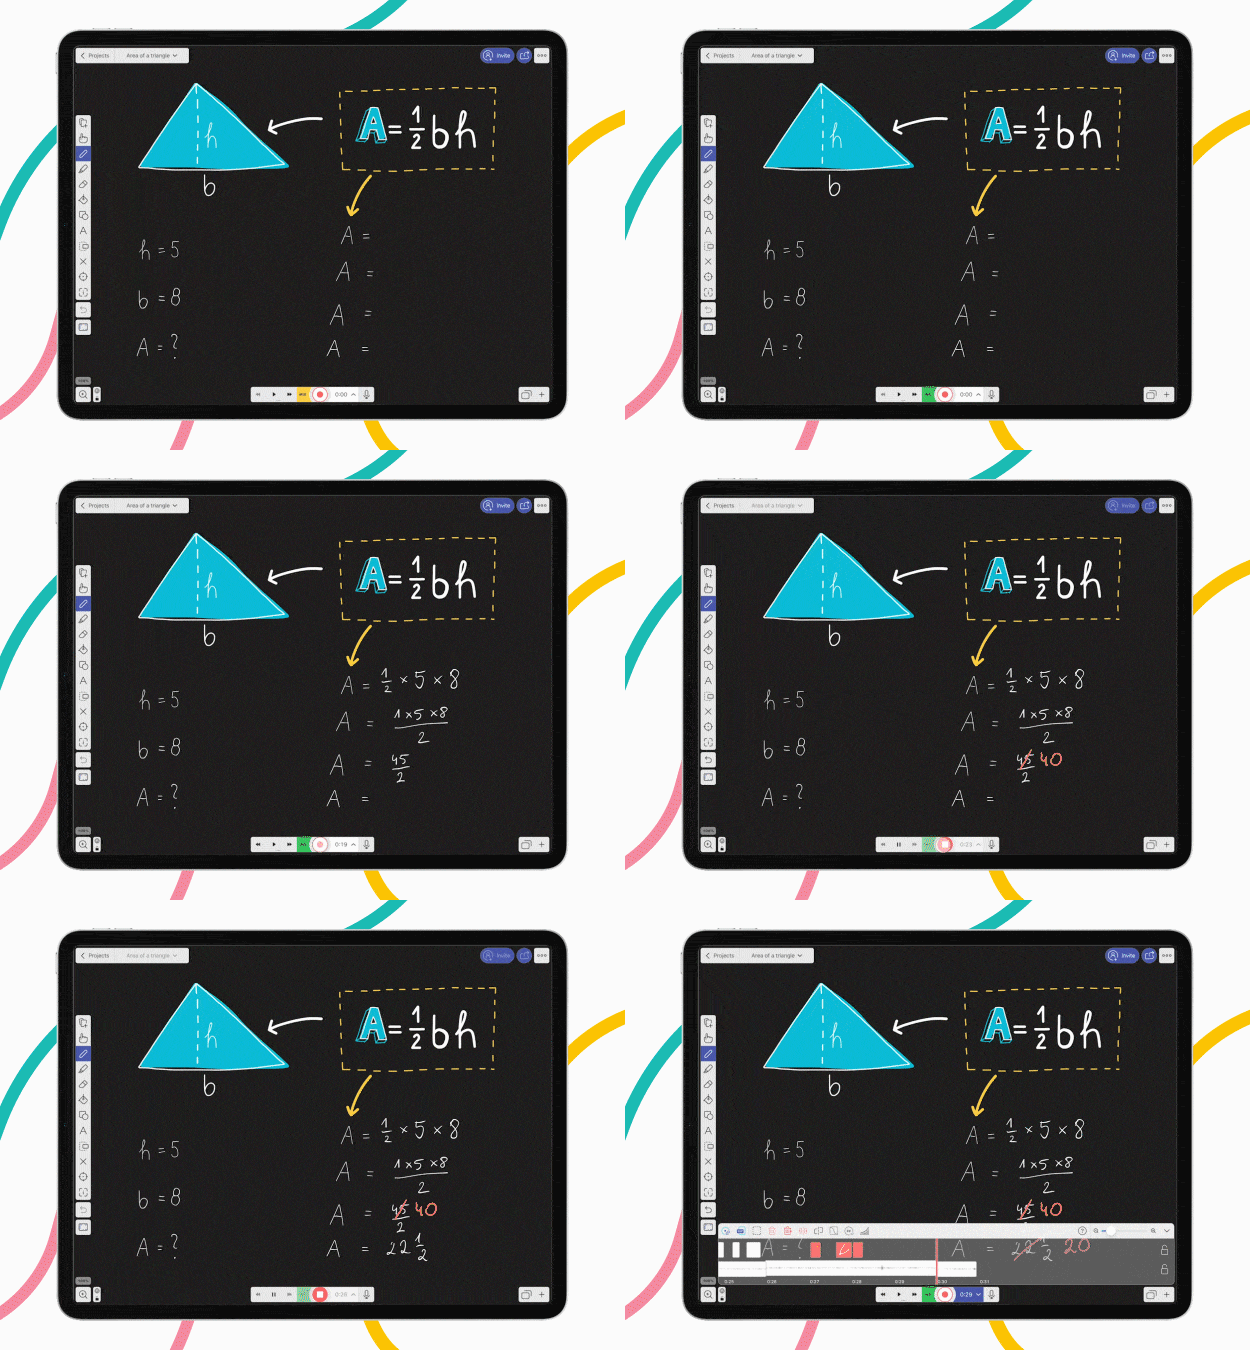
3. Review and leave suggestions by extending the student’s recording
Follow the steps below:
A. Switch to the Insert mode of recording, which will extend existing material by adding everything you say or do to the canvas.
B. Play the student’s recording and stop it when appropriate — that is, where you feel your contribution is needed.
C. Press Record and provide your input to enhance the project.
D. Play the remaining part of the student’s project. Repeat steps B-C as many times as you need.
4. Share your feedback directly with the student as a video
– In Explain Everything EDU, press Export -> Video. After the rendering is completed, share the file using your school’s repository or learning platform.
– In Explain Everything Interactive Whiteboard, press Export -> Create Web Video Link and share the link with your student. Video rendering will be handled off-device.
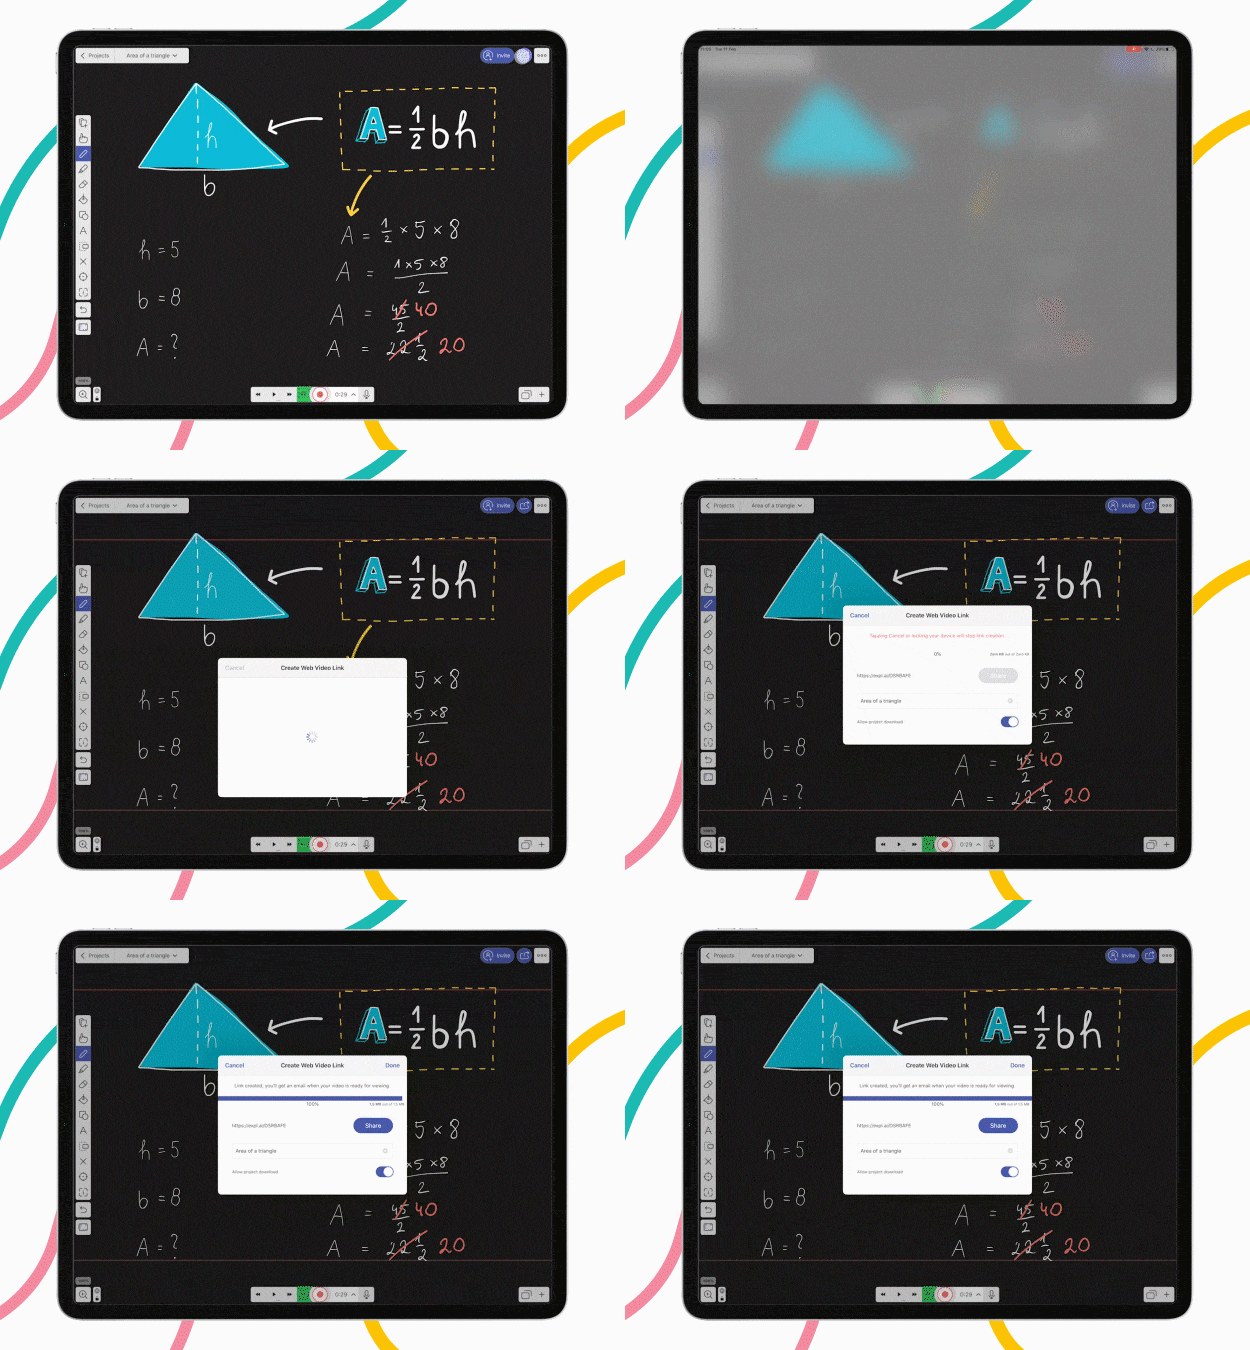
By following the steps listed above, teachers can leverage the ability to learn and understand, as well as provide suggestions in a rich video format. The use of recordings makes it possible to actually see the student’s thought process! It also allows student progress to be documented and shared with parents for reference.
One of humanity’s greatest dreams has always been the ability to read minds — with Explain Everything Whiteboard, that has been made a reality!
Hope that explained everything (see what I did there?). Good luck!

