Build Templates with Placeholders
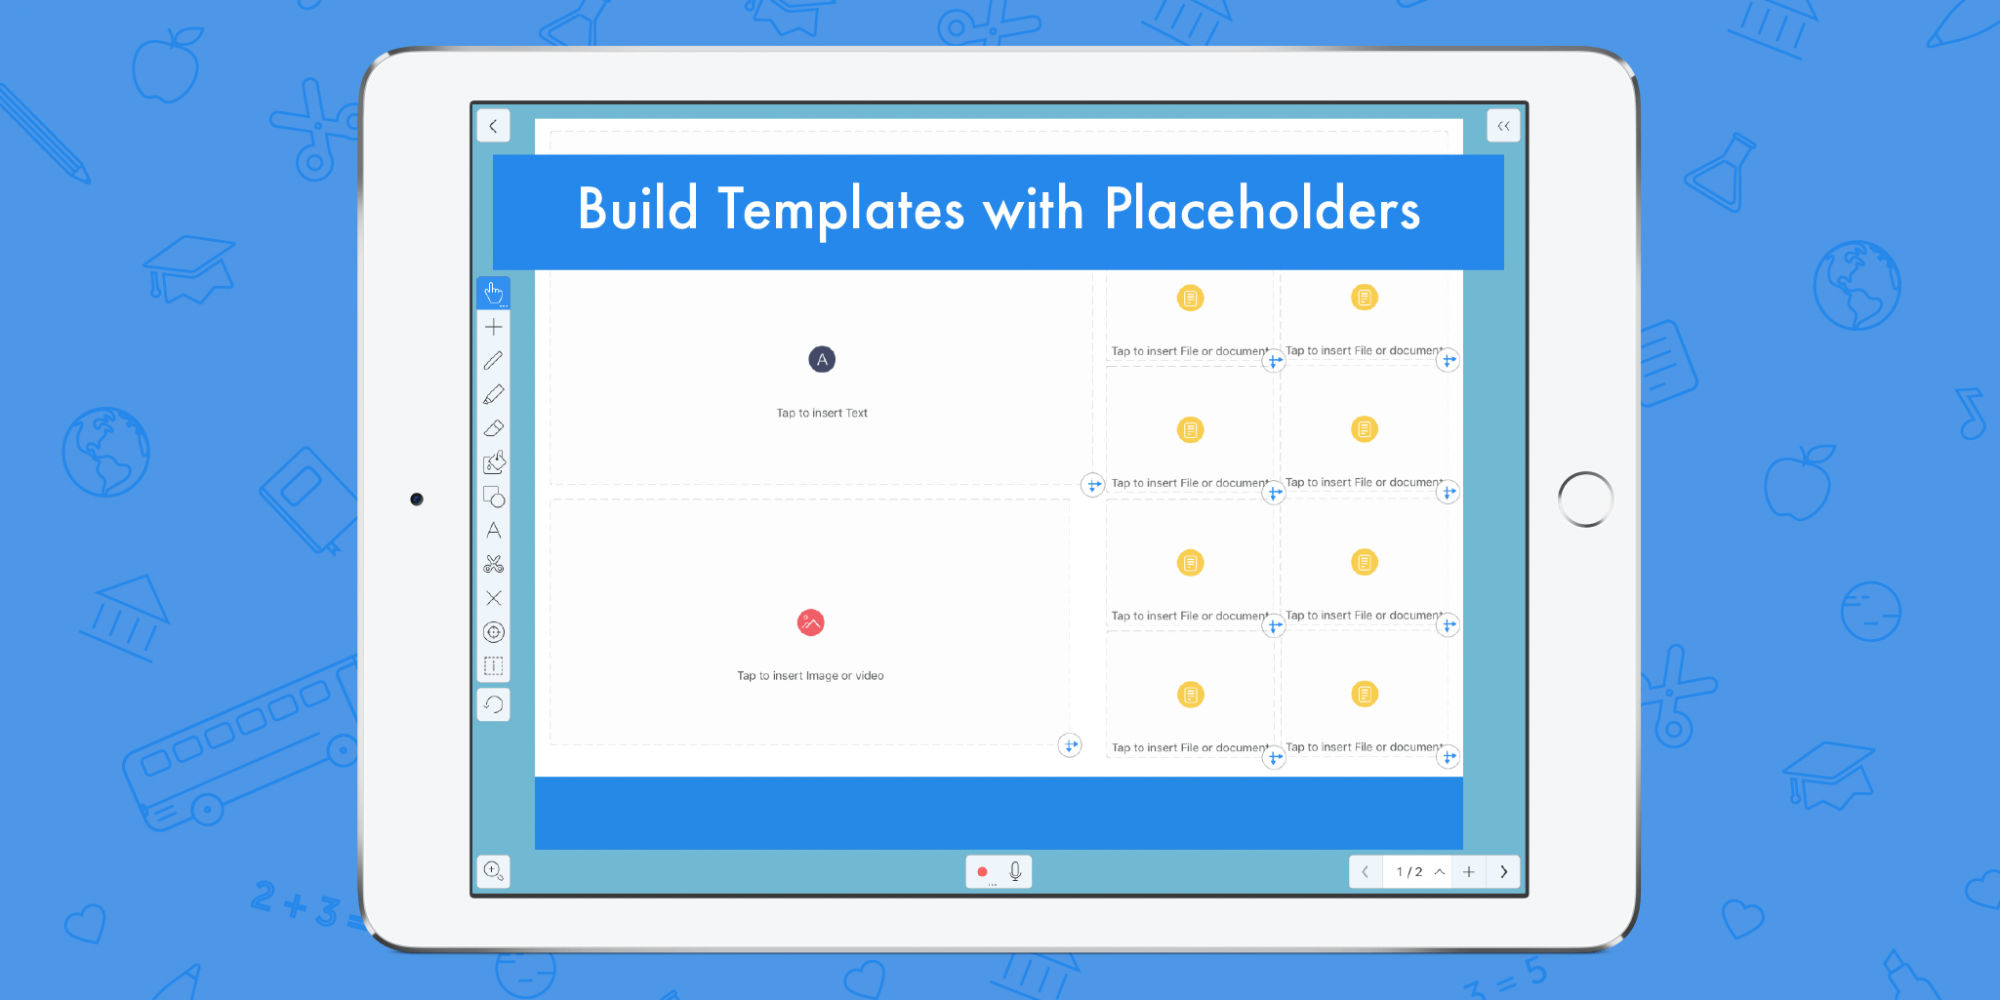
Table of Contents
Check out last week’s tip about using the zoom tool for emphasis!
How many documents filled with blocks of text describing an issue at hand have you created in the past week? Probably enough to be tired of creating custom documents. What if you could not only visualize those blocks of text to increase understanding, but create a template to make the process easier and faster! Explain Everything now has the ability to create templates to speed up your processes and make getting information to your audience easier than ever!
In this Tuesday Tip we’re going to show you how to use placeholders to create templates and really simplify your workflow!
What are placeholders?
Placeholders are assets in Explain Everything that you can insert into a project and then later tap them to add the appropriate content (images, files, video, audio, and clipart). Templates allow you maintain consistency in documents.
What you’ll need:
- A blank Explain Everything project
- An interest in unlocking the power of template building
- That’s it!
Step 1
First off is to make this template look good. Tap the Shape tool and then drag to create a large rectangle that fills as much of the screen as possible. Feel free to change the colors as you like!
Step 2
Next, we’re going to start inserting placeholders to start building the template.
Tap Insert -> Placeholder -> Text Box. The Hand tool will then automatically be selected and you can resize the text box placeholder in the bottom right corner. This box will be our title so size it accordingly and place it just above the top of your rectangle.
Follow the same process as above to add an image/video, a file, and another text box placeholder. Organize them so they fit into your preexisting rectangle.

Now your rectangle is filled with placeholders and you have your template!
Pro Tips:
- If you’re sending your template for someone to fill in, add a video of yourself explaining your instructions (don’t forget to tell them to delete your video before sending it back)!
- Once your placeholders are positioned, open the Inspector and group all of your assets. Now you don’t have to worry about accidentally moving them!
- Want to create a consistent multi-slide template? Simply tap the Slide Sorter (in the bottom right corner) -> Edit -> slide you want copied -> X2 and there you have it! An exact copy of your template

Step 3
Now that your template is created, tap the export button on the top right of your canvas and then tap Upload to EE Cloud. For easy sharing, tap the area that reads “Link sharing is OFF” which leads the user to another screen where you tap the area again and select “Anyone with a link can edit”. Your sharing link will appear on the bottom of the current screen. Then tap Close on the top left of the box and finally Done to finish the process.
To create a fresh copy of your template for sharing, tap the name of your project in the toolbar on the top of the screen. You can tap Duplicate to simply make a copy or if you want to rename it, simply type a new name and tap Quick Save.

Your project can be shared with the link you’ve just created and then downloaded and filled in by whoever you send it to!
Happy Explaining!
Do you use Explain Everything in an interesting way or would like to see something explored in depth? Contact us at connect@staging.explaineverything.com with your suggestions!

