Turn your static presentation into a video
Join the Explain Everything’s COO, Bartosz and learn how to bring your static presentation to life. Here are a couple of things you can do with Explain Everything to make that happen.
Don’t have Explain Everything yet? Download it now or try it out on the web.
Transcription:
Hello! I’m Bart from Explain Everything, the most innovative whiteboard and knowledge exchange platform. Today, feeling the support of the product team behind me, I’m going to demonstrate how to use existing powerpoint and turn it into a tutorial movie.
For that, I’m going to use my iPad pro here equipped with Explain Everything. So I’ll create a new project and we’ll import slides using this tool here. I can choose file and choose from any cloud destination of your choice. I have my slides here, and press import. Now, at this screen we can choose how to import slides. We can choose to import them separately or have them come together as a grid on one slide.
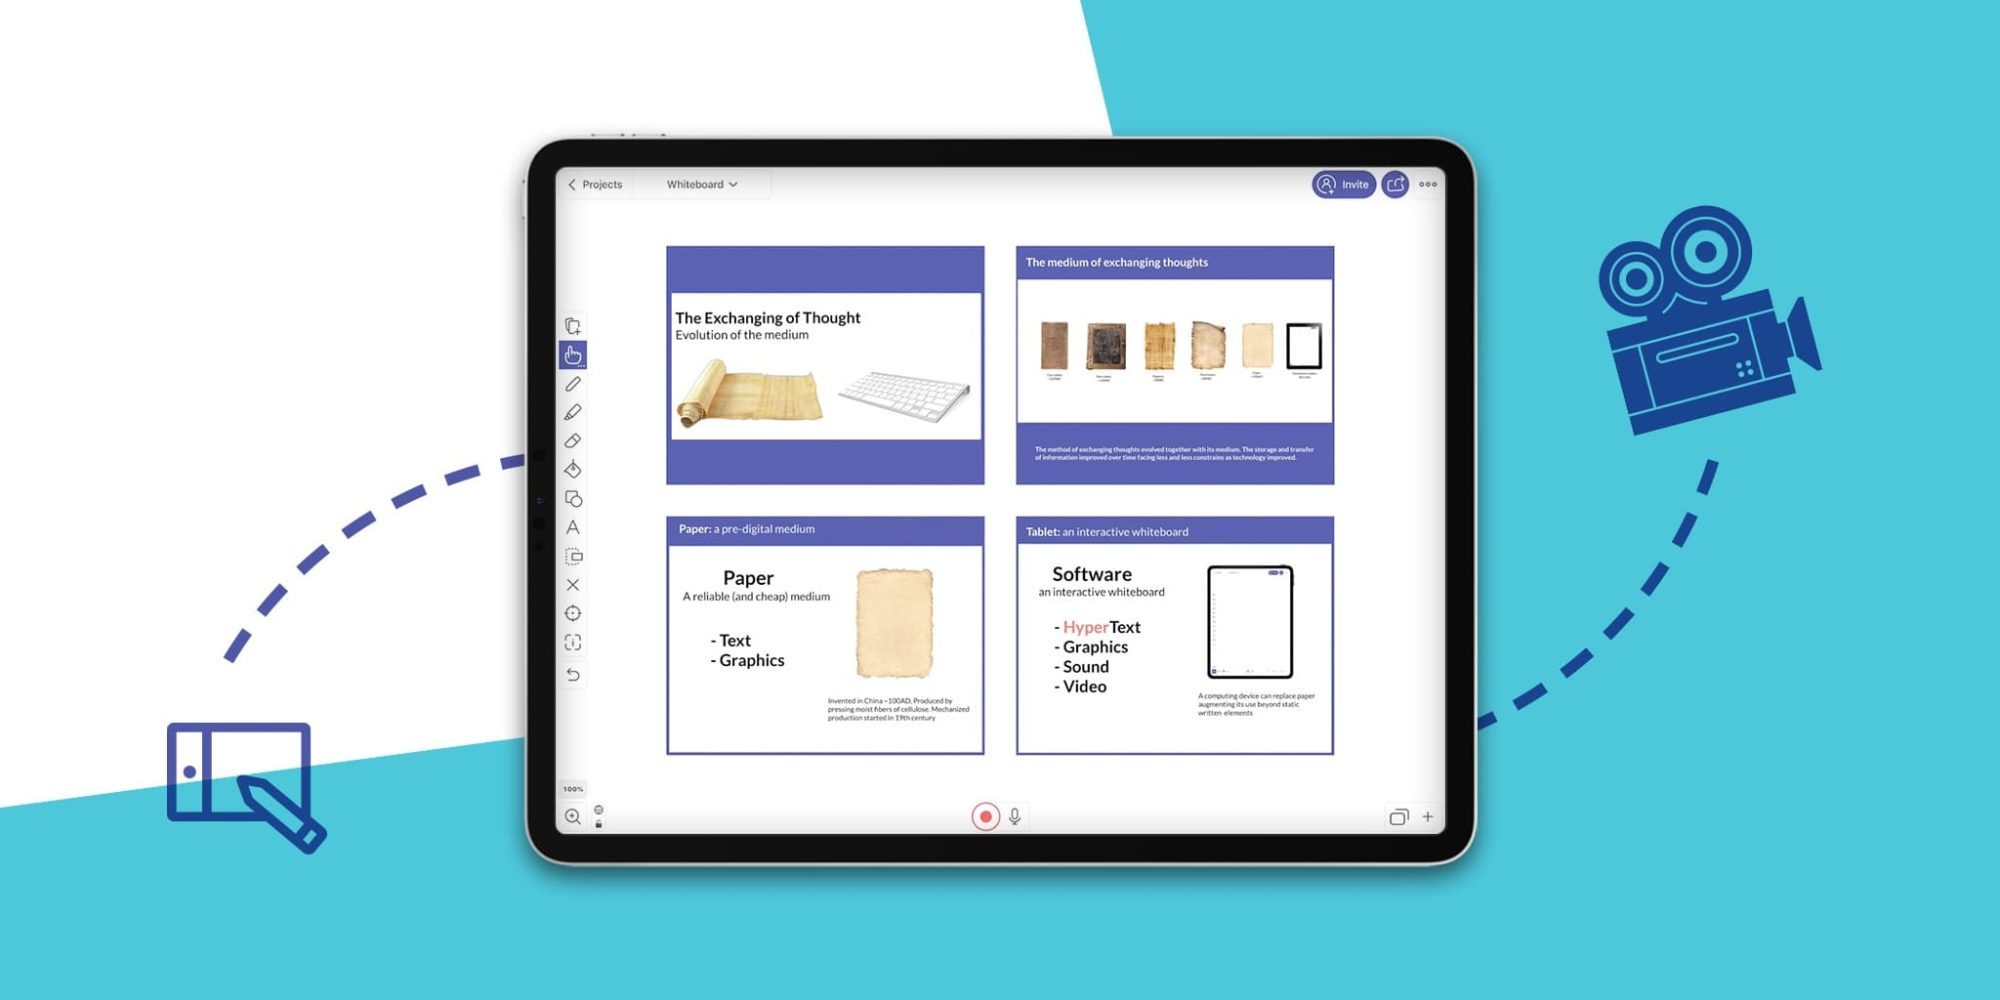
As you can see this is just a four slides long presentation. First thing to note is that your slides are grouped together. We can change that with the inspector tool so let me select the slides and here we have an option to ungroup them. Once we do that you can see you can move them separately. The second thing to notice is that Explain Everything allows you to use this gigantic space where elements of your project can be positioned. In the lower left corner you have a zoom tool here, that you can use to pan and zoom around.
For now, it will be easier for us to have those slides separately as we will be just recording a simple movie. So let me come back to the first screen, create a project again, and import my slides choosing the option to have them as separate slides here. So far so good! Now you can see we have a presentation that consists of four separate slides. You can move between slides here using the slide sorter.
Now, I’m ready to bring our slides to life! How do we do that? First of all, let’s record the voiceover. I’ll hit record here.
This is a presentation about the evolution about the medium used for exchanging knowledge. Let me play it back.
As you can see, only my voice was captured as I provided no additional input. But this slide would be more interesting if we add, let’s say writing on top of this papyrus roll. it’s so small, writing on it would be difficult. That’s why we’ll use the zoom tool again, but this time in ninja mode. Why ninja? As we know those guys were clever enough to sneak around without anyone else noticing. So you can do as a ninja would and zoom in or pan around without changing the view that is being recorded.
So let me tap the ninja zoom, I’ll rewind to the very beginning of this recording and record again.
Alright! And as you can see here, my ninja perspective hasn’t changed the recording, so I can play it back. The result of this simple recording brings us to the key destinguising feature of Explain Everything. As you can see I recorded the same thing twice. First, I added my voice, then recording again, I added a writing effect.
I can repeat this trick over and over again, re-recording and adding elements for a more sophisticated result. What Explain Everything does is that it repeats my movements and plays the back. It’s kind of like a digital monkey that repeats after you and a digital parrot that speaks your words as you provide them.
So, let’s add one additional effect to this slide before we end our work here. Let’s try to type above the keyboard.
And let’s see how it plays together now. And there you have it. A cool effect with very little effort. Let me show you what we can do with the static content of the remaining slides.
So, I’ll go ahead and switch to slide number 2. Here you have a set of graphical elements that we could animate instead of having them without any movement. So I’ll go ahead and first of all, I’ll cut them out from their background using the cut out tool.
As you can see I created a copy of those elements. And I’ll put those copies aside for now as I’d like them to enter my frame while recording. Ok, and I put the paper here and maybe tablet here. Alright!
Since we have the ability to record voice we don’t actually need this text, so why don’t we cover it with a white rectangle? It’s going to be kind of like a fake background for us. Ok. Now you need you need ot remember that because the background was created after those cutouts, it is above those objects now.
So what I can do again, is to use the inspector and change the arrangement. I can send this artificial background to the back and then one level to the front covering the contents of my original slide.
Now, onto recording here, I’ll try to record both my voice and motion at the same time. And because I have those objects outside of the visible frame of the recording, I will just be bringing them in. So, let’s start with hitting record here.
The capacity of medium for transferring information wasn’t very impressive at the beginning. The storage wasn’t permanent either. Only after inventing papyrus in Egypt did things start to move forward. The remaining constraint however was availability and cost of the medium such as parchment.
Hit stop. And let’s try to play it back. I guess you have the idea now!
So let’s move to slide number three. First of all, lets remove the bullet points. Nobody likes them really. We can do better with authentic inscriptions. I’ll remove these using a white pen, and now let’s record the slide.
The exchange of knowledge flourished with the invention of paper. But as a carrier of information it was still limited only to text and graphics. What? No voice or video? Obviously Youtube had to wait.
And as you see, Explain Everything captured all the strokes I made with the pen tool.
Ok! So let’s move to the final slide. I’ll remove the bullet points again. Be gone!
We’ll also as before, cut out the iPad as I need it for my animation later on. I’ll use the zoom tool with the ninja mode to move it aside and I’ll try to cover the existing iPad from the still slide with a white background.
Now, all I need to do is to move this to the front so I can introduce the iPad while speaking about it. But first of all, let’s record the voiceover.
Hit record.
Everything has changed with the advent of digital devices. Such as the iPad and proper software for knowledge transfer, such as Explain Everything.
So now we have an audio track, so let’s find the moment I speak about the iPad. Here I’m speaking about the iPad and want the iPad to be introduced at this very moment. So I can pause on the second number five, grab the iPad with my finger and we’ll introduce the iPad. It will fly onto the slide like this.
Hey, I’m speaking about Explain Everything, but I don’t have any element suggesting it. An icon would be great, so since I don’t have anything I’ll bring in Safari, go to the image search. And look for the Explain Everything icon. There you have it!
All I need to do is grab the icon and put it on the canvas. I don’t need a browser anymore. I’ll zoom in here, position my icon properly and run the remaining recording adding some more movements. Alright! And let’s play this slide back.
And perhaps I can also add that it provides you with the ability to use not only text and graphics, but audio and video. And since I added those descriptions it will just appear at this very moment on the second element here.
And there you have it! Now we can play back the entire presentation starting from slide 1 using the golden play. What is the golden play function? Well press and hold the paly button so you can play the entire piece full screen.
So to recap, Explain Everything let’s you turn your static content into an animated movie that you can export to Youtube or make available under a link in no time. Let me show you how to do that.
In the top right corner, you have this Export button and you can hit create web video link. This will make Explain Everything upload this presentation to the cloud. And create a link under which the video will become available once uploaded.
And that’s the link you can copy and use anywhere you like. That’s it! Think how productive communication can be when instead of attaching slides you can authentically communicate your points and forget the bullet points, use your voice and persuasion now with Explain Everything, you can.
Hope you enjoyed these instructions! Next time we’ll show you how to use Explain Everything when working over distance with others. Until then!

